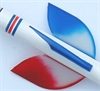
Vane Stain™


 REVIEWS
| |
AVLM (Actual Vane Length
Mass)
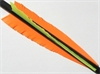
4" Rain Vane Feather-Like™ - 3.4"
4" Plains
Vane -
4.0"
4" Shark's
Tooth™ -
3.4"
3" Hyper
Delta™ - 1.5"
2.5" Shark's
Tooth™ - 1.9"
BBW -
Broadhead Blade Width should never exceed the width
of your fletched vanes.
 bideltavanes@aol.com
Phone -
716-896-4734
International - 0101-716-896-4734
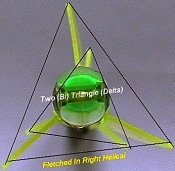
Bi-Delta® Vane Systems
25 Dempster St.
Bflo., N.Y. 14206-1307
Home -
Contents - News - Vane
Models - How To - Help - Search
- Order
Single Fin Target/Mechanical
Broadhead Vanes bideltavanes@aol.com
Phone -
716-896-4734
International - 0101-716-896-4734
Bi-Delta® Vane Systems
25 Dempster St.
Bflo., N.Y. 14206-1307
Home -
Contents - News - Vane
Models - How To - Help - Search
- Order
Single Fin Target/Mechanical
Broadhead Vanes
|
 Home - Contents - News - Vane
Models - How To - Order -
Help - Search
Bi-Delta Archers - Reviews
- Inquiries - Dealers
Single Fin Vanes
Home - Contents - News - Vane
Models - How To - Order -
Help - Search
Bi-Delta Archers - Reviews
- Inquiries - Dealers
Single Fin Vanes